MFA
MFA, or Multi-Factor Authentication, is a security method that requires users to provide two or more forms of authentication before accessing an account or system.
In other words, it's quite annoying, might take you a while to get used to, but it's a crucial layer of protection for your accounts.
Why is MFA important?
MFA adds an extra layer of security to your accounts by requiring multiple forms of verification. Even if an attacker obtains your password, they still cannot access your account without the additional factor.
How do you set up MFA?
Setting up MFA is a straightforward process. You'll need to go to the security settings of your account and enable MFA. You'll then need to choose an authentication method, such as a code sent to your phone or a biometric scan.
In this process, we will be using Google Authenticator to secure a Google Account.
- You will need a smartphone to scan QR codes.
- Google Authenticator must be installed on your smartphone. You can also use other authenticator apps like Microsoft Authenticator.
- Make sure you have access to your Google account and can log in.
- A private place to secure your backup codes.
This tutorial is also applicable in any other app that supports MFA, all you need is a compatible authenticator app.
Step-by-step setup about 5 minutes
-
If you're on the web version of Google,
click on your profile picture in the top right corner,
then click on "Manage your Google Account."
If you're on mobile, open the Google app and tap on your profile picture,
then tap "Manage your Google Account."
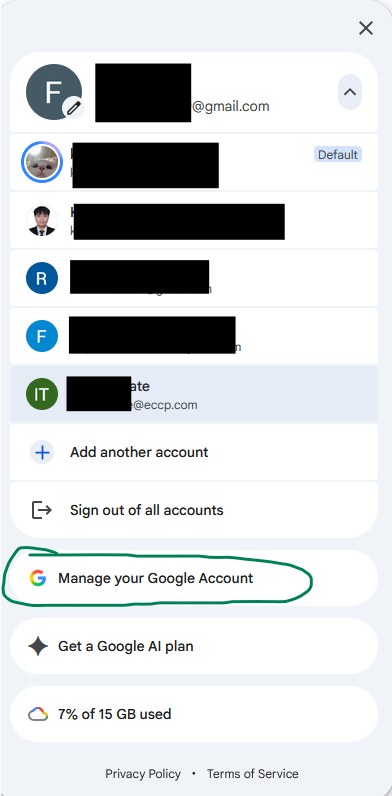
Manage your Google Account Press this button to access your account settings. - Open the account's security settings and choose authenticator app.
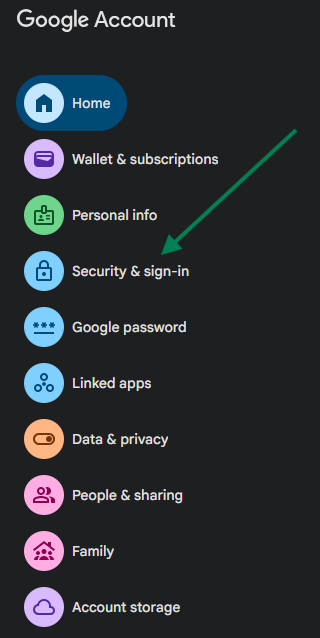
Security and Sign in Press this button to access your Security options. - Press the 2-Step Verification button.
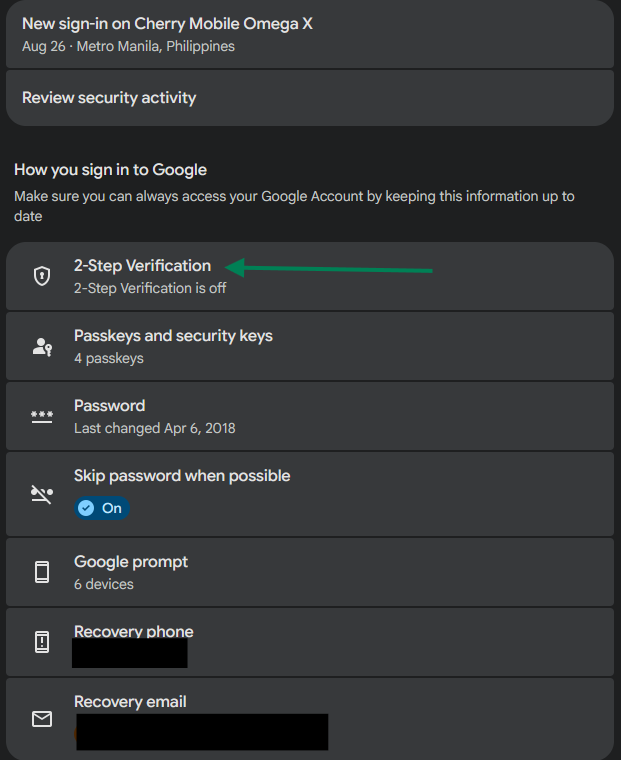
2-Step Verification Press this button to access your 2-Step Verification options. - Select Authenticator App.
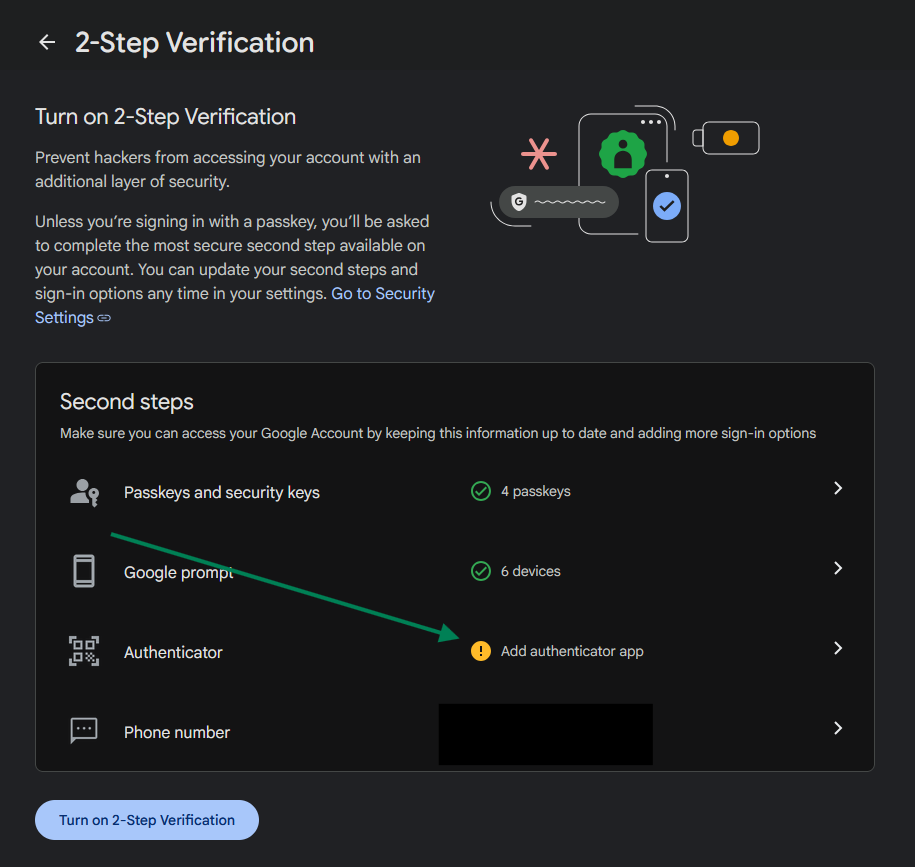
Authenticator App Press this button to access your Authenticator App options. - In the authenticator app, use your main google account and after you created the mfa account, press the + button and scan QR code.
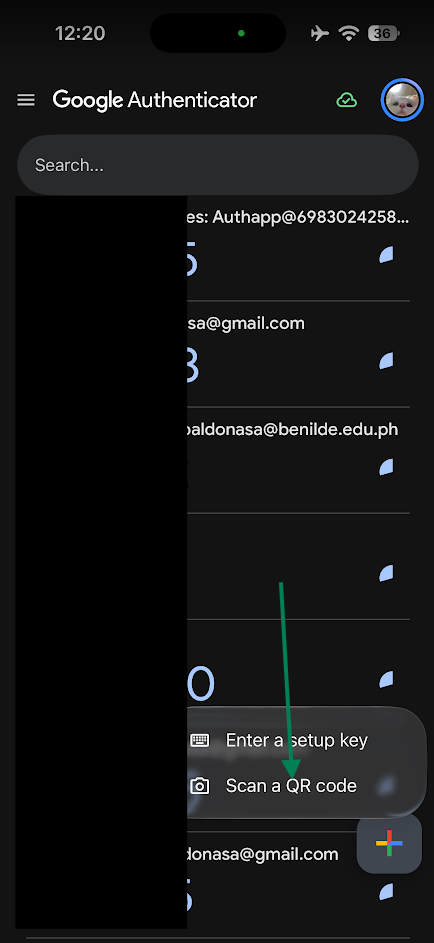
Scan QR Code Press this button to scan the QR code and add your account to the authenticator app. - Confirm by inputting the code in the authenticator app. Then after that, your authenticator is now set up for use. Congratulations!
You're done when you can log in with the authenticator app.
When something goes wrong
If you lose access to your authenticator app or your phone, you may be locked out of your account. It's important to have a backup plan, such as a list of recovery codes or a secondary authentication method.
If you lost your phone
- Immediately access your recovery codes and use the recovery process to regain access to your account.
- Remove the Multi-Factor Authentication from your account after you regained access to your account.
- Set up Multi-Factor Authentication again on your new phone.
- If this happened to a work account, contact your IT department immediately.
If you get a prompt you didn't ask for
- Immediately deny the request if you didn't initiate it.
- If this happens to you, it could mean that someone else has access to your password.
- Change your password immediately. Don't wait, or you could be at risk.